Plan Your Project
Manage Stormwater Runoff in Your Own Back Yard
Do-it-yourself stormwater solutions are simple practices that capture rain and snowmelt from roofs, driveways, patios, and even lawns and encourage it to soak into the ground. Find everything you need to complete your SOAK project on our Resources page.
5 Easy Steps to Soak Up the Rain
STEP 1: Observe
To determine if a property is well-suited for a SOAK project, walk around the property and observe problems and opportunities. A SOAK project can help reduce runoff even if no obvious problems exist.
-
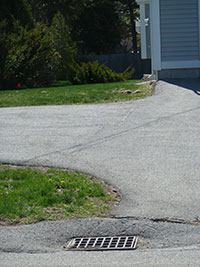
Look for opportunities to prevent stormwater directly running into collection systems
Observe where stormwater comes from, where it goes, and any problems that it may cause along the way.
- Look for site constraints such as shallow bedrock or steep slopes in the project location.
- Test soils to determine whether infiltration is possible with a Simple Perc Test.
STEP 2: Select
One you have decided on a good location for a SOAK project, think about what type of Stormwater Solution would be a good fit. Look through the Stormwater Solutions Do-It-Yourself Fact Sheets to choose one and verify that it’s a good match for the situation.
⇒If you need some help, try using a flow chart below.
Infiltration Practice Flow Chart: Infiltration practices allow water to soak in.
Storage & Conveyance Practice Flow Chart: Storage practices store water, such as in rain barrels and dry wells. Conveyance practices move water from one location to another, such as swales.
Step 3: Design
Now that you have selected a stormwater solution to install, use the DIY fact sheet to complete the design.

Each Stormwater Solution has unique design guidelines. Consider the following:
Thoroughly read through the DIY fact sheet to determine any design requirements or limitations.
Size your practice using the instructions on each DIY fact sheet.
Develop a planting plan, if needed, for practices that include plants, such as rain gardens and vegetated swales. The Native Plants for New England Rain Gardens provides a useful list.
Special considerations for Rain Gardens:
- The Rain Garden DIY fact sheet helps you design a rain garden to capture all the runoff from the drainage area from a storm that produces 1 inch of rain. If you don’t have room to build a rain garden of that size, build a smaller one and expect it to overflow more often. If you’d like, build it larger to capture larger storms.
- In New England, the soils can vary greatly and contain material such as large boulders and fill that are difficult to remove. While designing, dig several test holes to the “total depth to dig” to find out what is underground and determine what tools and help you’ll need. Make adjustments to the size or location as needed.
- The Rain Garden Calculator, provided by Three Rivers Rain Garden Alliance, can be a helpful design tool and uses the same size calculations as SOAKNH.
Determine the stormwater footprint, if desired. A “stormwater footprint” is the amount of stormwater runoff and associated pollutants that a property creates. Use the NH Residential Loading Model available from the Winnipesaukee Gateway to estimate yours.
STEP 4: Install
Now that you have chosen and designed your practice, here are a few tips to help your installation day run smoothly.
Recruit volunteers. You will likely need a number of helpers – friends, family, local youth 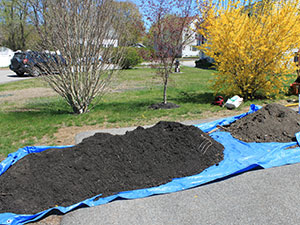 groups, or volunteer groups – on hand to help on installation day.
Order Materials. Order materials and arrange for pick-up or delivery in advance of the scheduled installation day.
Mark outer boundary of the practice. Use a garden hose, stakes and string, spray paint, or some other method. Include any berms or retaining walls.
Call Dig Safe. Before digging on your property, state law requires that you call Dig Safe at least 72 business hours in advance of digging to ensure no utility lines are buried in your project area. This is a free service, but the outer boundary of the project area must be clearly 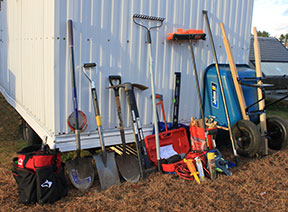 marked prior to the visit.
Gather Equipment. Most stormwater practice installations require only hand tools. If you plan to use heavy equipment, like a mini excavator or other machinery, and live within 250 feet of a waterbody, determine whether a Shoreland Water Quality Permit is needed.
Time Frame Guide:
- 2 months before installation: Begin recruiting volunteers
- 1 week before installation: Order bulk materials; shop for plants
- 4-5 days before installation: Call Dig Safe – Mark boundaries of areas to dig
- 1-2 days before installation: Pick up bulk materials; remind volunteers
- Installation day: Hand out copies of the plan (if using) and assign tasks
STEP 5: Maintain
Most maintenance practices are similar to typical home and garden activities and can be completed by the property owner. By following the general maintenance steps below, a stormwater practice should continue working to protect water quality. Maintenance recommendations for individual practices are included in the fact sheets.
Inspect
- Periodically and after rain events, inspect the practice for any obvious signs of stress or failure.
- Remove accumulated debris and sediment as needed.
- Check for ponding or slow draining water – this can be a sign of clogging.
Plants

You may need to water your rain garden between storms for the first year or two to allow perennials to become established
- Water new plants frequently until their roots are established.
- Weed as necessary in the first few years until plants become established.
- Check plants for signs of stress, disease, and die-off and replace as needed.
Mulch
- Initially 2” – 3” of mulch should be used to maintain soil moisture.
- Replenish mulch when needed.
- Once the plants are established (2-3 years), mulch may not be needed.
Other Materials
- For practices with stone and other materials, periodically remove accumulated sediment, debris, and weeds.
- Practices lined with geo-textile fabric can clog over time.
- Check for ponding or slowly draining water. If clogged, remove and wash the stone to clean out the accumulated sediment and debris.